How to paint a Redcat Racing clear RC car body


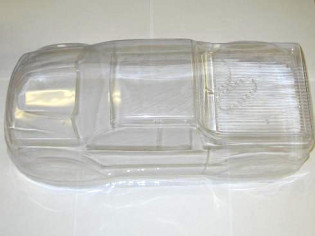
1/10 Truck Clear Unpainted Body
We all want our Redcat Racing RC cars to look impressive. An easy way to customize your ride is with a new body. There are many bodies available and many color possibilities. Here’s some easy steps to painting your own RC car body.
- Wash the inside of the clear body with liquid dish soap and water.
- Slowly dry the body with a paper towel. Do not buff the body with the paper towel, static will build. Do not use a blow dryer. The fast moving warm air will create static electricity in the plastic body making it difficult to paint.
- Scuff the inside of the body with a 3M scuffing pad, green or red. Do NOT scuff the windows or any other area remaining clear.
- Now is a good time to mark the body posts on the outside of the body with a sharpie marker. Place the body on the chassis and put a dot over each body post. You may need to remove the tires. You can also wait and mark the post later if you wish.
- Wash the body again. Yes, this extra wash is necessary for a great looking body.
- After the body is dry, mask off the windows and any other area you don’t want to paint.
- Using painter’s tape or liquid mask, cover the areas you don’t want to get the first color on. If using liquid mask, follow the directions on the bottle. It will take several thin coats.
- Cut out the design.
- Make sure there is not lint on the body.
- Paint a light even coat of paint. A thick coat will run under the masking tape, apply several thin coats and let dry in-between coats. Use paint designed for polycarbonate plastic. Regular spray paint will crack and flake off.
- Remove the masking tape, leaving masks on windows, and paint the next color. Even light coats. Usually takes four coats per color. You can make the body as tame or wild as you like. An airbrush is helpful for detailed designs.
- Coat the entire body with an under coat, usually white. If using candy color, undercoat with silver.
- Trim the wheel wells with special body scissors, they have a small curved blade (similar to ladies specialty nail scissors)
- If you haven’t marked the body posts yet, apply a small amount of grease to each body post and carefully place the body down in place. Gently lift the body, careful not to smear the marks, and drill the grease spots.
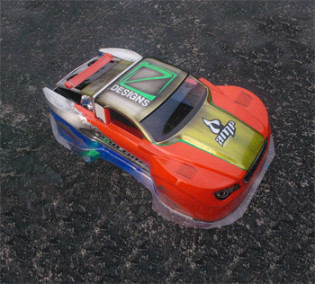
- Remove the body’s clear outer plastic protective coating and you are ready for action.
Fill out my online form.
There are no comments yet, add one below.